Posts

DrawBot

Image
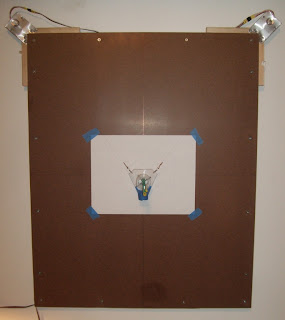
A while back I ran into an article on Make about a Vancouver maker named Dan Royer. The article talks about a kit for something called a DrawBot . The DrawBot uses two stepper motors hung at the upper corners of a flat board. On the steppers are spindles of mono-filament line (fishing line) and between them is a pen. On the board is paper. Running the steppers is an  Arduino  and a  Motorshield . The goal? Have the computer (connected to the Arduino) tell the Drawbot to draw something on the paper. Brilliant, right? Check out his site for videos of the DrawBot doing it's thing. Very cool. The sketch on the Arduino is code written by Dan that is essentially a G-code interpreter. It'll take instructions sent to it by the connected computer and direct the pen accordingly. This is something I'd been looking for: a way to learn G-code, by doing. Seeing as I already had an Arduino. Not an Uno, mind you - a Duemilanova '328 board, but still. I also have a Motorsh...
Atiny85

Image
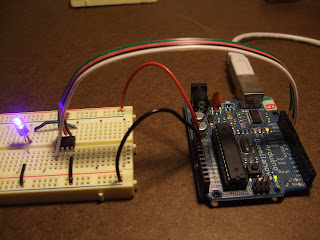
A while back I ordered an Attiny 2313 from Adafruit . Along with it I ordered a USBtinyISP to program it. For whatever reason I could never get the thing working.  The process involved downloading AVRDude , WinAVR , and various steps of setup. After getting everything installed & following the instructions carefully, I still couldn't get it to work. I did submit some questions on Adafruit's forum & got some answers, but I suspect the problem was either I'd made a mistake in assembling the   USBtinyISP  or just my general lack of understanding of what was going on. It was also possible I'd wrecked the chip, so I gave up after a while. Later I decided it might have been better to take myself out of the equation, so again I ordered another programmer and some chips, this time from Sparkfun: a Pocket AVR programmer , another Attiny 2313 and an Attiny85 . So far I've not gotten around to trying out their AVR programmer & until recently the chips staye...

Persistence of Vision (PoV)

Image
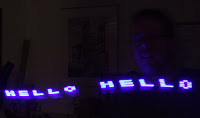
Because it was quick and because I wasn't getting much done on other projects, I decided to look into Persistence of Vision (PoV) . PoV was fairly simple to set up with the RBBB . I put the RBBB in a breadboard, ran a patch to the ground rail and added in five blue LEDs. I started with a sketch of my own that sort of worked, but not well. So I figured I'd have more luck looking on the Arduino playground . There I clicked on Interfacing with Hardware and searched on PoV. There I found a link to an art icle written in German by someone named Michael Zoellner. I didn't understand the German but the sketch that was linked had comments in English. I made some tweaks to the code to allow for adjustments and ran it. It worked fairly well so I updated the setup so I didn't have to run it off of the USB cable & added battery power. This made it easier to hold it in my hand and wave it in front of a camera. I set up a camera on a tripod, lowered the ISO to 100 and turned d...

New 'duinos

Image
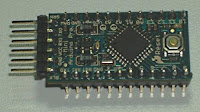
I haven't posted in a while. I have still been busy tinkering, but for one reason or another haven't gotten around to posting. I have made some progress on my design for a color fading juggling ball, and have started some other projects, but I think I will save them for another post. Instead, I'll say a word or two about some new purchases. When I built the web cam pan this summer, I sent with it my one and only Arduino. It was an older one with an Atmega 168 and 16 k of memory so I was looking to upgrade. Prior to sending it off, I first bought an Arduino Pro Mini 5.5v / 328 from Sparkfun . I also had to get an FTDI breakout board for it as it doesn't have on-board USB communications. Man, that thing is tiny! It's about the size two postage stamps! Pictured here is what it looks like after putting pins all over it so I can snap it into a breadboard. I did learn one thing with it - solder carefully. The picture you see here is actually my second Pro Mini. With...

Web Cam Pan

Image
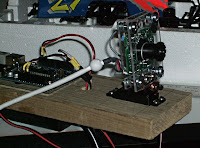
Here is a photo of a project I started a while back. I took an old Logitech web camera we had sitting around, removed it from it's case and sandwiched it between two small sheets of Acryllic. My reasoning here is it would be easier to attach that to a servo than the weird sphere casing it was originally in. Really, I think it just looks cooler that way. The servo is bolted to - well through - a plank I had in the garage. I think it's left over from building the deck. A plank, yes. Probably green-treat or some such. If I could've figured out a way to get duct tap on it, I probably would have. Anyway, behind the web camera is an Arduino Duemilanova (168) - the original/first one I got. It's connected with some simple wood screws through the board. Underneath all this, on the other side of the plank is a Power Switch Tail . This nifty little device is a bit like a really short extension cord with a switch. Regular 120 volt house current goes in one end and comes out the ot...

Steppers and the Motor Shield

Axman Surplus is awesome. I've been thinking of building a CNC . There are a number of articles on the web that'll walk you through building a CNC, including this one on how to build a desktop CNC . That one, in particular, could use a tool I already have - a Dremel. Anyway, a CNC is complicated. There's a whole language used for communicating with CNC's called g-code , that is pretty much a complete mystery to me. Then there's taking 3-d models and converting them to g-code, and probably any number of details I don't have figured out. It'd be a bigger project than I've tackled so far. But like anything, I've got to start somewhere, so I figured I'd start with equipment I already have. In this case I'm referring to the Motor Shield I got from Adafruit . I built it a while back and then set it aside and never used it. So I figured this was a good time. I'd already figured out how to run a servo on the Arduino, but the Motor Shield has p...

Still on XYZ and RGB

Image
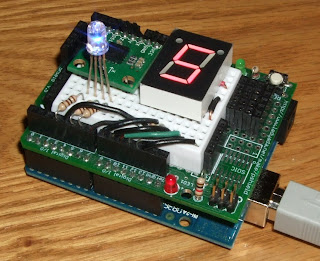
It should come as no surprise that I am still somewhat obsessed with my accelerometer. I've stated earlier that I'd like to create a lighted juggling ball that changes color as it rotates. This should be a simple task with an accelerometer - three axis, three colors, mix 'em and you're done, right? Maybe not so much. I won't rehash previous posts, but I will say I am really close. I should, however, explain my criteria: Rotation should change color of the light, obviously At a minimum, there should be shifting between the 3 basic colors: red, green, blue I'd prefer 6 colors total, with the other 3 being mixes: yellow (red/green), aqua (green/blue), and purple (blue/red) I'd like to get some nice fading as it switches between colors, but as I'll point out later, this is somewhat hard The light intensity should never change - all on, and never off I'd prefer it if there wasn't much white - all colors on - showing I already have code on the Arduin...